NEUTRALS

NEUTRALS IN FASHIONNOVA

Early this year, I made some purchases from FASHIONNOVA and I haven’t styled them, I took a good
pause reflecting on personal goals for my blog, business, career and creating DIY posts. I hope you’ve checked out my previous post here.

NEUTRALS IN FASHIONNOVANEUTRALS IN FASHIONNOVA

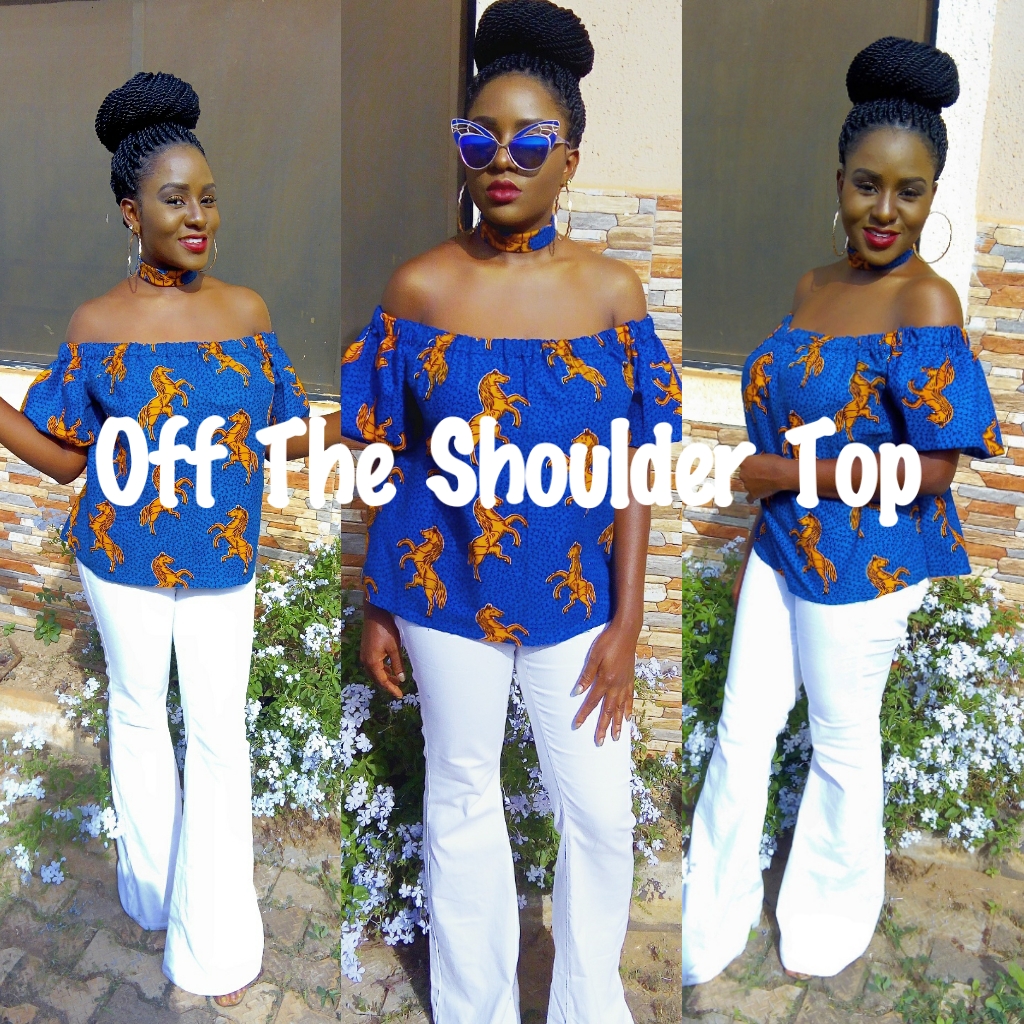
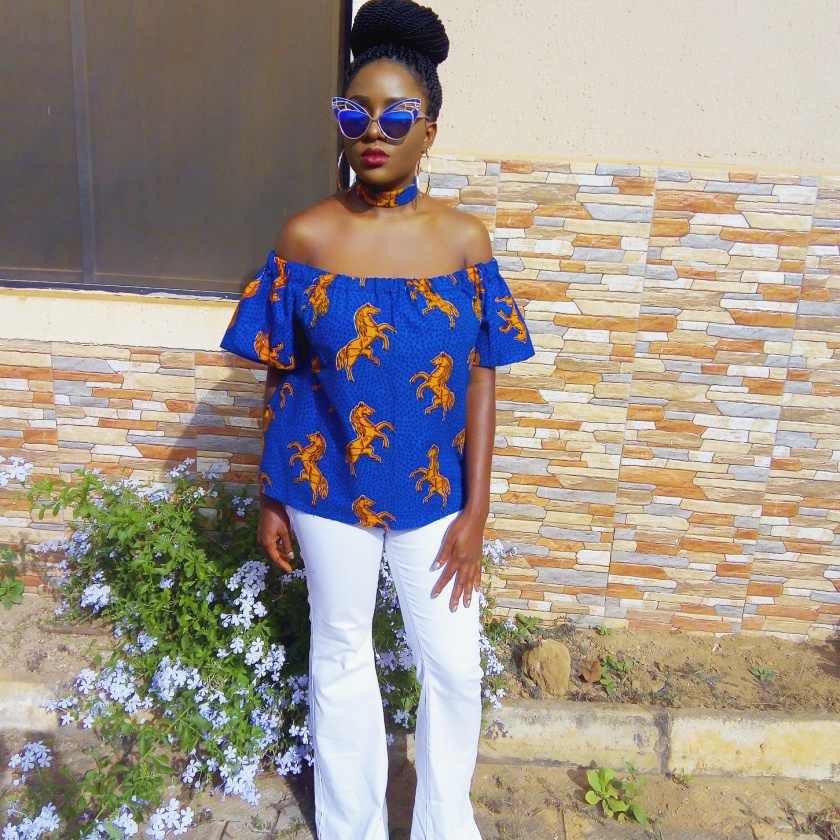
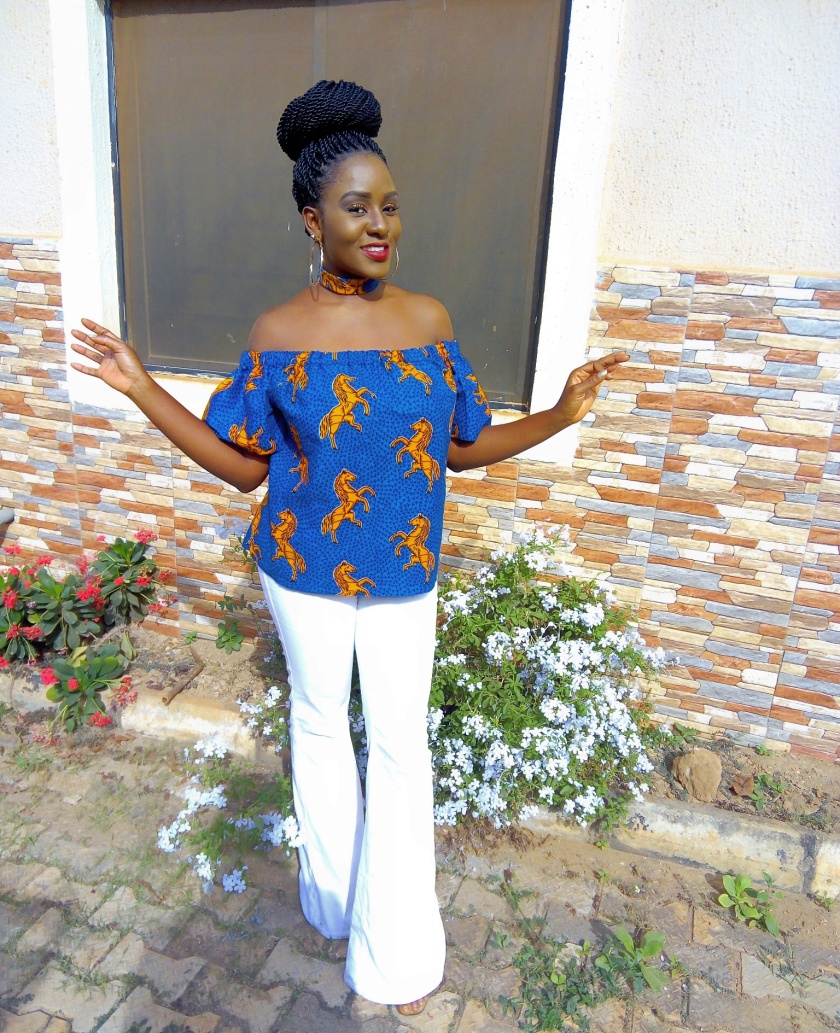
The best way I wore the plunge was with a full button and I thought about my white flare jeans. I’ve had the flare white jeans since 2015 and I’ve rocked it gazzillon times.

NEUTRALS IN FASHIONNOVA

NEUTRALS IN FASHIONNOVA

What other way to wear pink than with white. I had worn this top with a skinny blue jeans (lost the picture every where after I deleted it from instagram) and I didn’t like the look because all the attention was still at the top.

NEUTRALS IN FASHIONNOVANEUTRALS IN FASHIONNOVA

Top – Fashionnova (Available in Small Size)

Jeans – Fashionnova (Sold out)

Thanks for reading! I hope you like this post! What are your thought?

Don’t forget to follow my blog via email.

Xoxo,

Tonye.</p

DIY basic T-shirt to embroidered rose T- shirt

Happy Monday lovelies. How was your weekend? I hope everyone had a good weekend. Make the most of this new week!

Today I’m bringing you a post that will totally update your wardrobe…

Processed with VSCO with m5 preset

DIY basic T-shirts to embroidered rose T- shirt

Embroidered patches has taken the world by storm; from Dolce & Gabana – embroidery being their signature detail to the latest Gucci trend and I am more than obsessed!
Patches are fun way to stand out and add a frisky, unique twist to your outfits.
Literally no one likes to wear what everyone else wears, patches can be customized to match your outfits which can elucidate vibrancy in your personality.
In today’s post I’m using an embroidered rose applique to create my own unique ensemble of art.

What you’ll need:

* plain white shirt
* embroidered rose applique – I got mine here.
* an iron
* a cardboard

How to:

1. Place the cardboard between the shirt.

DIY BASIC T-SHIRT TO EMBROIDERED ROSE T-SHIRT

2. Arrange the embroidered rose applique on the right side of the shirt.

DIY BASIC T-SHIRT TO EMBROIDERED ROSE T-SHIRT

3. Heat up your pressing iron and place on the applique. Starting from one end to the other.

DIY BASIC T-SHIRT TO EMBROIDERED ROSE T-SHIRT

DIY BASIC T-SHIRT TO EMBROIDERED ROSE T-SHIRT

4. Leave the iron for 2 minutes but do not burn your applique.

DIY BASIC T-SHIRT TO EMBROIDERED ROSE T-SHIRT

DIY BASIC T-SHIRT TO EMBROIDERED ROSE T-SHIRT

VOILA!!!

DIY BASIC T-SHIRT TO EMBROIDERED ROSE T-SHIRT

What are you thoughts on this? Indulge in the trend, create something!

PS: I will be showing how I made the tassel earrings in the next post.

IMG_20170319_164301_755

Thanks for reading.

Xoxo,

Tonye.

DIY: Embellished Jeans

Happy Monday lovelies, hope your weekend was popping. My weekend was all about creating this embellished jeans. I first laid eyes on Marjorie Harvey embellished jeans that you would break the bank for.  Here, I purchased this white jeans and some embellishments to create this look. Comparing the prices of an embellished jeans and what you will create will save a lot for you. Taking this few steps then you have yourself an embellished jeans.

You’ll need:

  • The pair of jeans of your choice
  • Embellishments of your choice

img_20161127_211400_485

img_20161126_170633

How to:

1. Choose desired point on the jeans.

IMG_20161127_212316_983.jpg

2. Place the embellishments on desired point.

IMG_20161126_171132.jpg

3. Clip the embellishments on the inward part of the jeans.

IMG_20161126_171123.jpg

Viola!!!

img_20161127_143955

img_20161127_213545_236

img_20161127_160548

Jeans: Olarslim

I hope you liked this DIY.  Create your own look. Let’s see what your create.

Xoxo,

Tonye.

DIY: The Off-Shoulder Top

Pretty much, the off-the shoulder trend is all around. A trend that has been, is and would stick around for a while. I made mine off an excess fabric I had and pulled this outfit in no time with just ‘a needle and a thread’. You can pull this off if you feel you want to go with the trend in this simple DIY tips.

You’ll need:

  • A pair of scissors
  • A needle
  • A thread
  • Elastic band
  • Safety pin
  • An African fabric

img_20161106_213750_675

How to:

1. Cut two equal fabric measured from your should to your waist for the top.

img_20161106_214320_349

2. Cut two smaller equal rectangles for the sleeves.

img_20161106_214435_630

3. Fold the two rectangular fabric for the sleeves into halves.

img_20161106_214547_597

4. Align the open sides of the sleeves with the seams of your top.

img_20161106_214815_056

5. With you threaded needle, sew the sleeves together with the sides of the front and back together.

IMG_20161106_102106.jpg

6. Once you’re done sewing, fold the top of your garment using the elastic band as a guide.

IMG_20161106_112024.jpg

7. Iron the top of the garment you folded. This allows you to sew evenly.

IMG_20161107_005503_999.jpg

8. Sew along the bottom of  the folded section to create a fabric loop leaving room between the start and finish.

IMG_20161106_121250.jpg

9. Take safety pin and attach it to the elastic.

IMG_20161106_121356.jpg

10. Thread it thought until the elastic appears at the other end.

IMG_20161106_122223.jpg

11. Sew the elastic together.

img_20161107_010410_693

12. Adjust the fabric.

IMG_20161106_124353.jpg

VIOLA!!!

img_20161106_155025img_20161106_183145img_20161106_185046img_20161107_094625