Trend alert – consider elevating your wardrobe with tassel assessories this season – tassel earrings paired with a simple white tee or a bare neck, the ruffled and long strands can create a good look. I love the way this element brings movement to a look. There are obvious tonnes of designs of tassel earrings you can cop for yourself.

I decided to make tassel earrings from the most available and useful material, yarn. It took me about 10minutes from start to finish.
Tip: If you really want to show your tassel earrings, style you hair in bun.
What you’ll need:
*yarn
*earrings hook
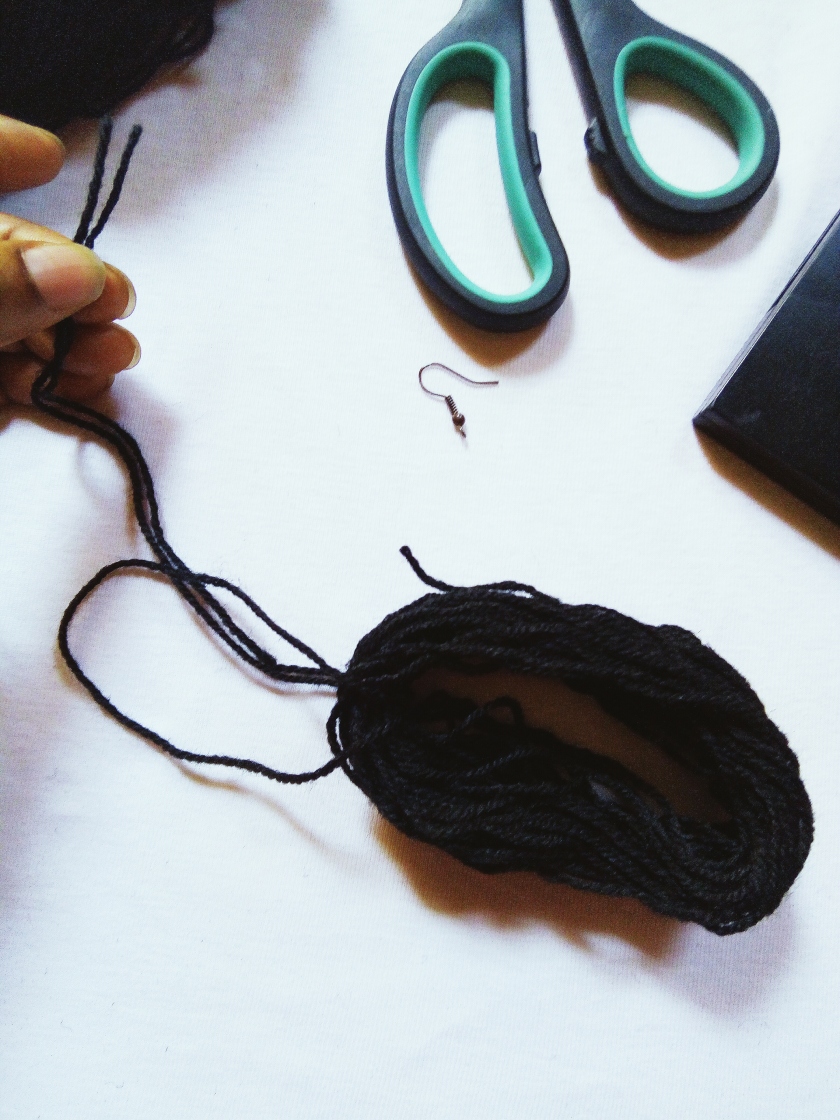
*a pair of scissors
* flat platform
1. Roll the yarn around the flat platform (say 40 times).

2. Remove the yarn from the platform.

3. Take another piece of yarn and double it.

4. Put the doubled ice of yarn through the main yarn.

5. Take the cut end of the doubled piece of yarn and pass it through the other round end – as seen below – to form a knot.
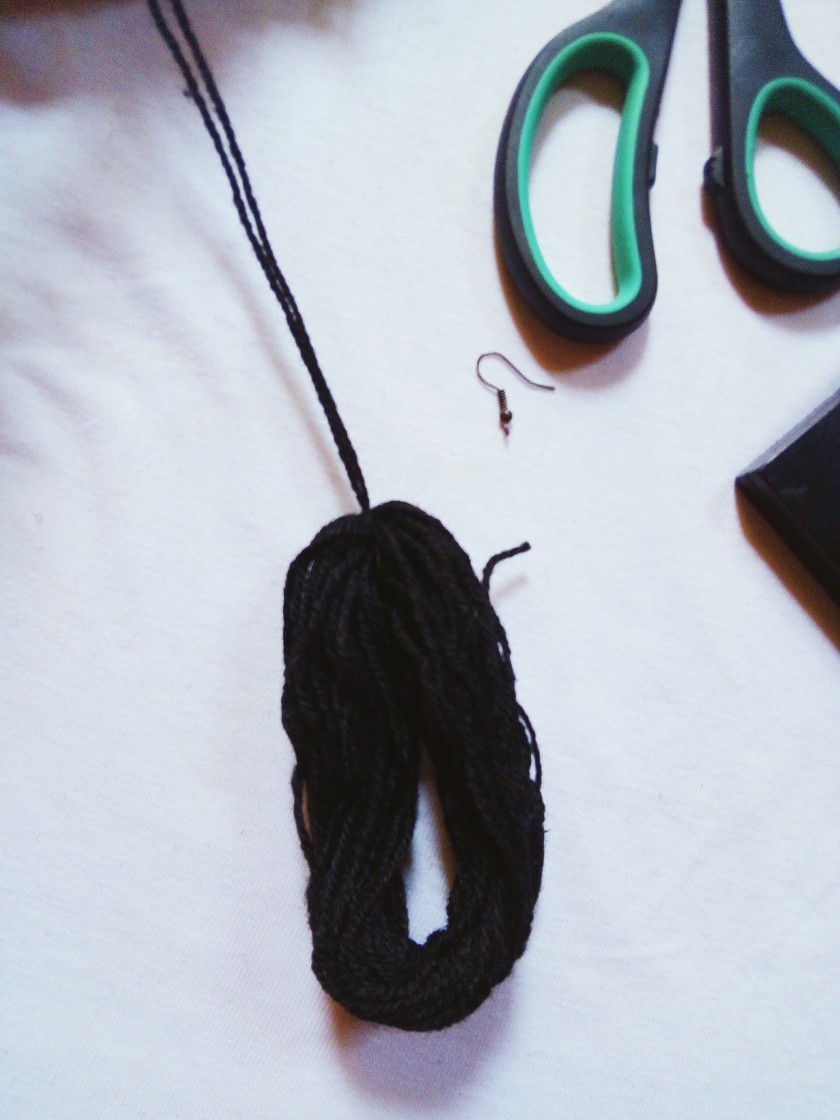
6. Cut to form the bottom of the tassel.

7. To form the knot of the tassel, take one string and wrap 2cm from the top.

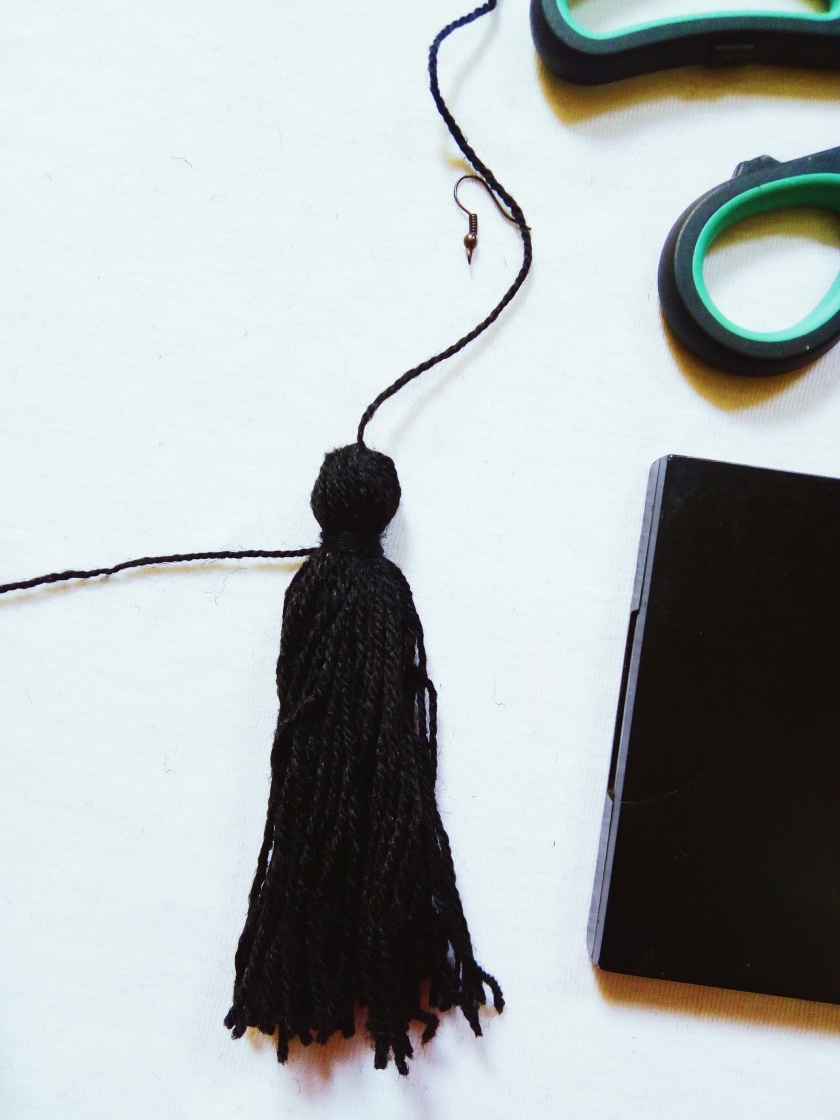
8. Pass the hook height the second string and wrap round the knot of the tassel.

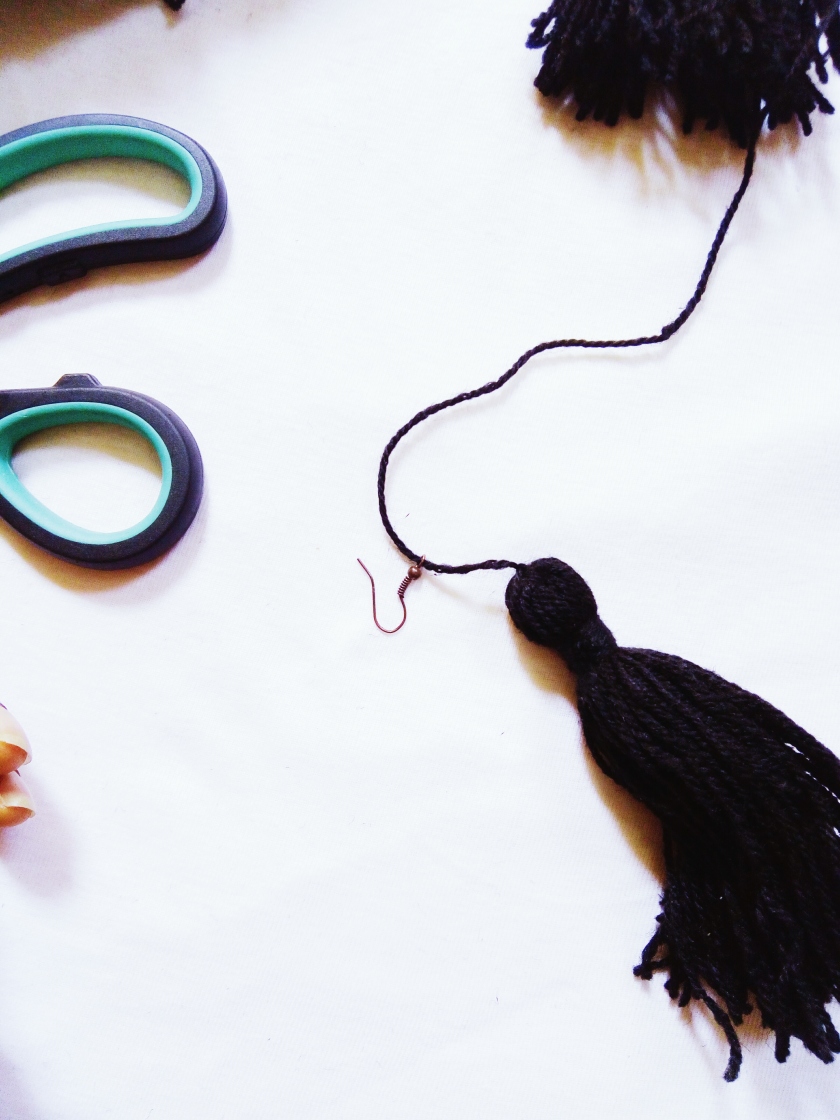
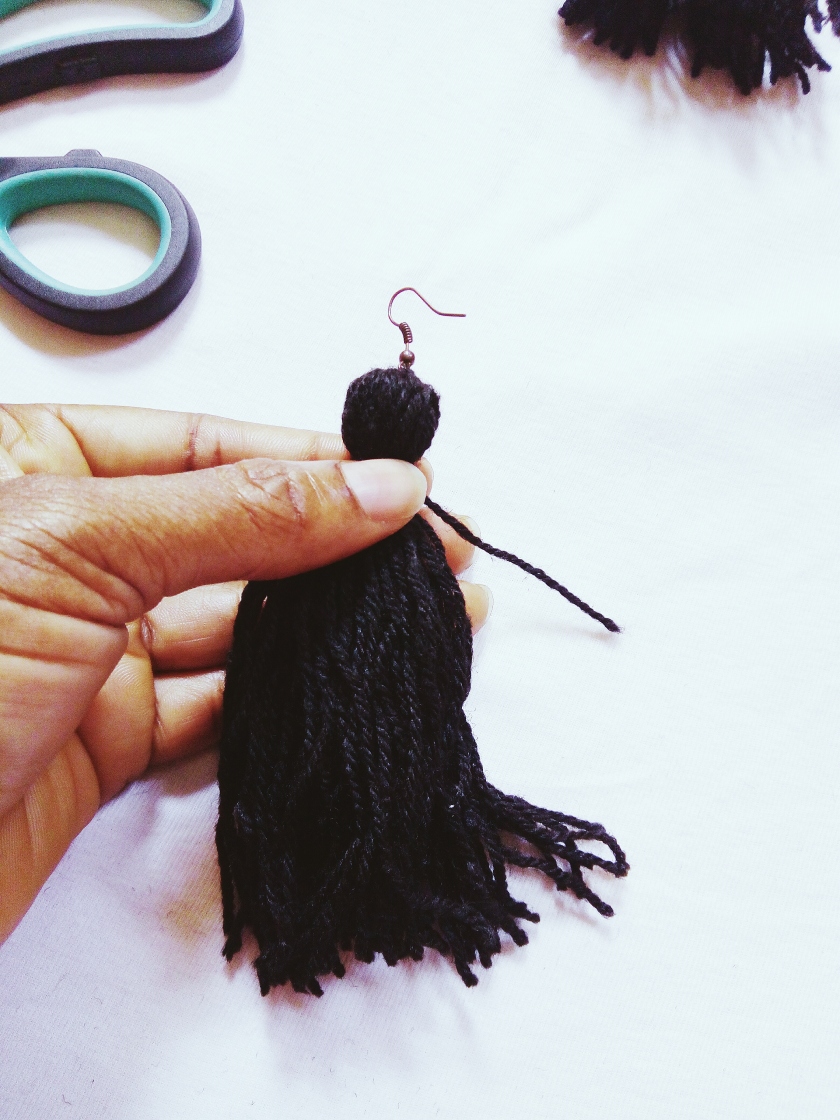
Voila!!!

Would you cop this trend?
Do you think this look can be cool or does it seem too retro for your taste?
Share your thought.
…
Xoxo,
Tonye.